Overview
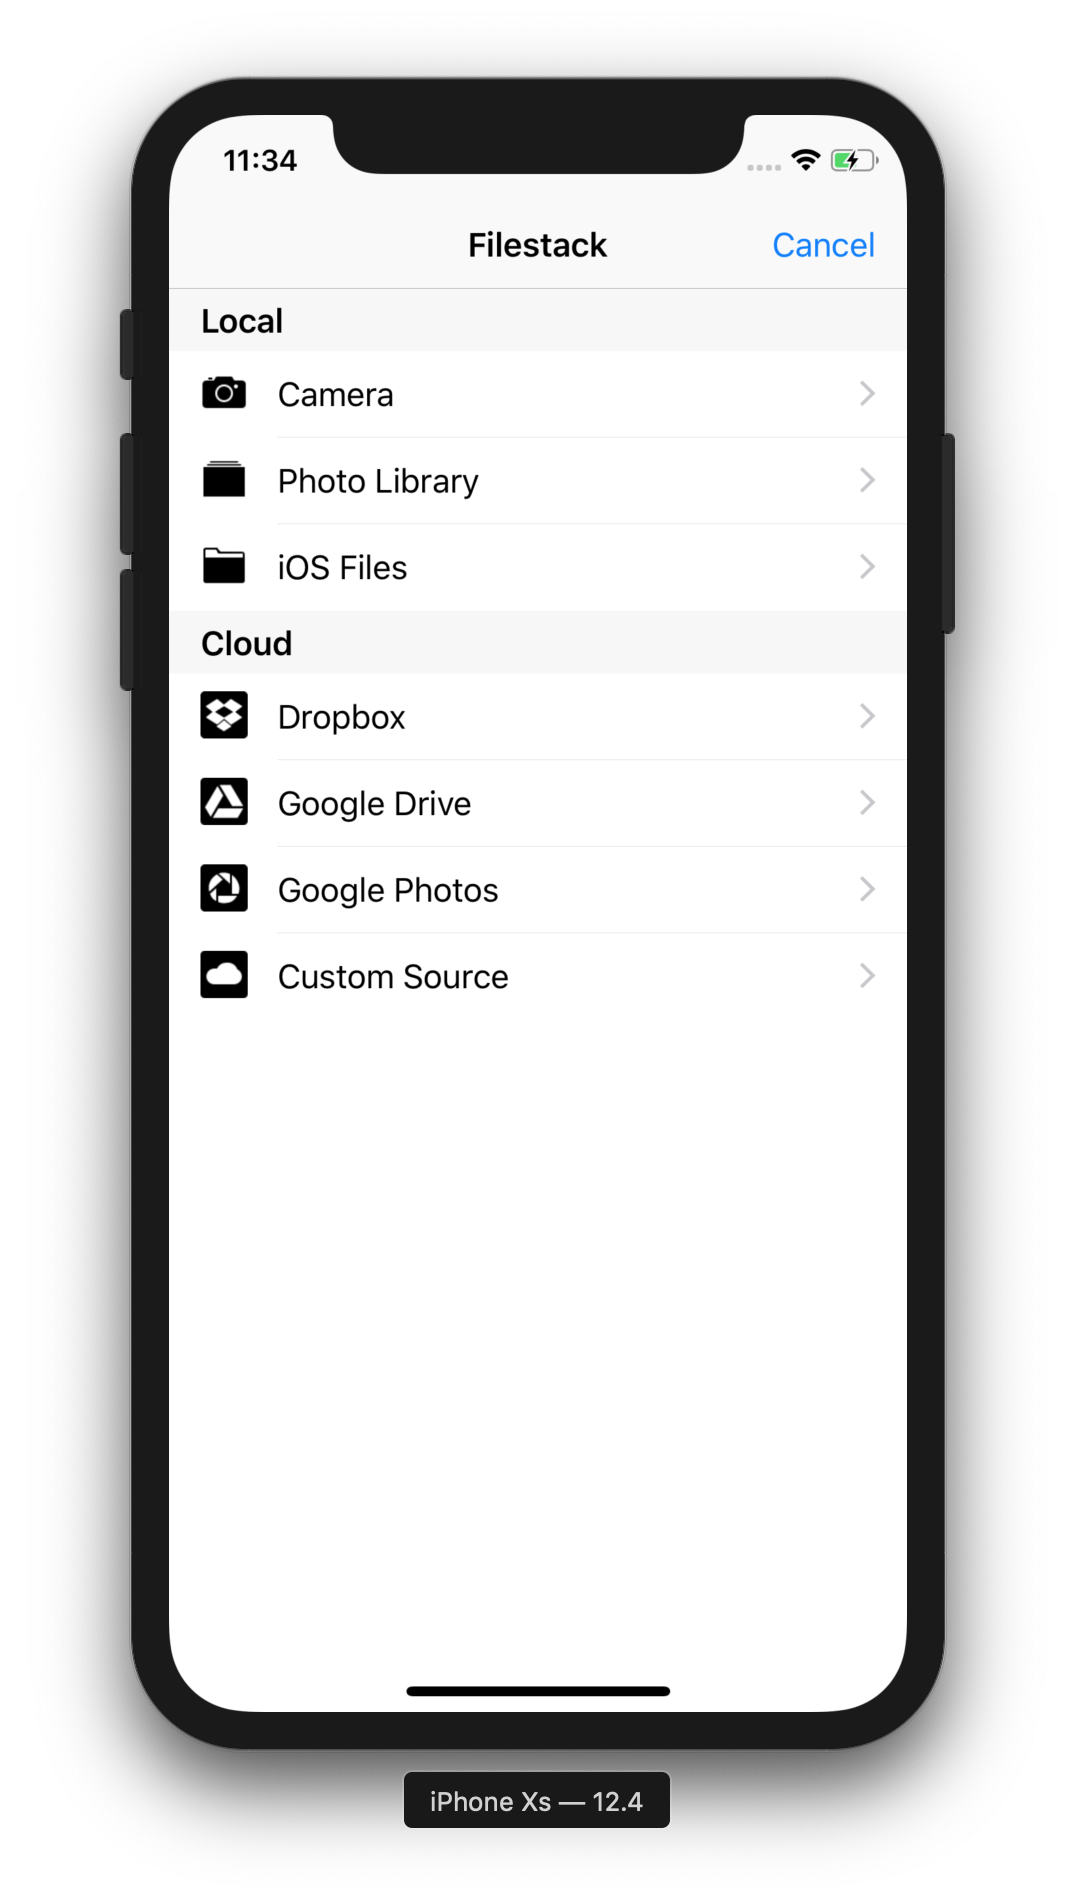
Filestack iOS SDK allows connecting your iOS mobile application with your Filestack account. You can allow your mobile users to upload files (photos, images, documents) directly from their devices to your Filepicker storage. It also allows them to access their cloud-stored files (like Facebook, Dropbox, or Instagram).
The Filestack iOS SDK supports iOS 11 and later.
List of features
- Upload local files programmatically or interactively by letting the user pick files from:
- Camera
- Photo Library
- Document Picker (iOS Files)
- 3rd party cloud provider (e.g., Dropbox, Instagram, Facebook, etc.)
- Programmatically list and store contents from a cloud provider into a store location (e.g., S3, Azure, etc.)
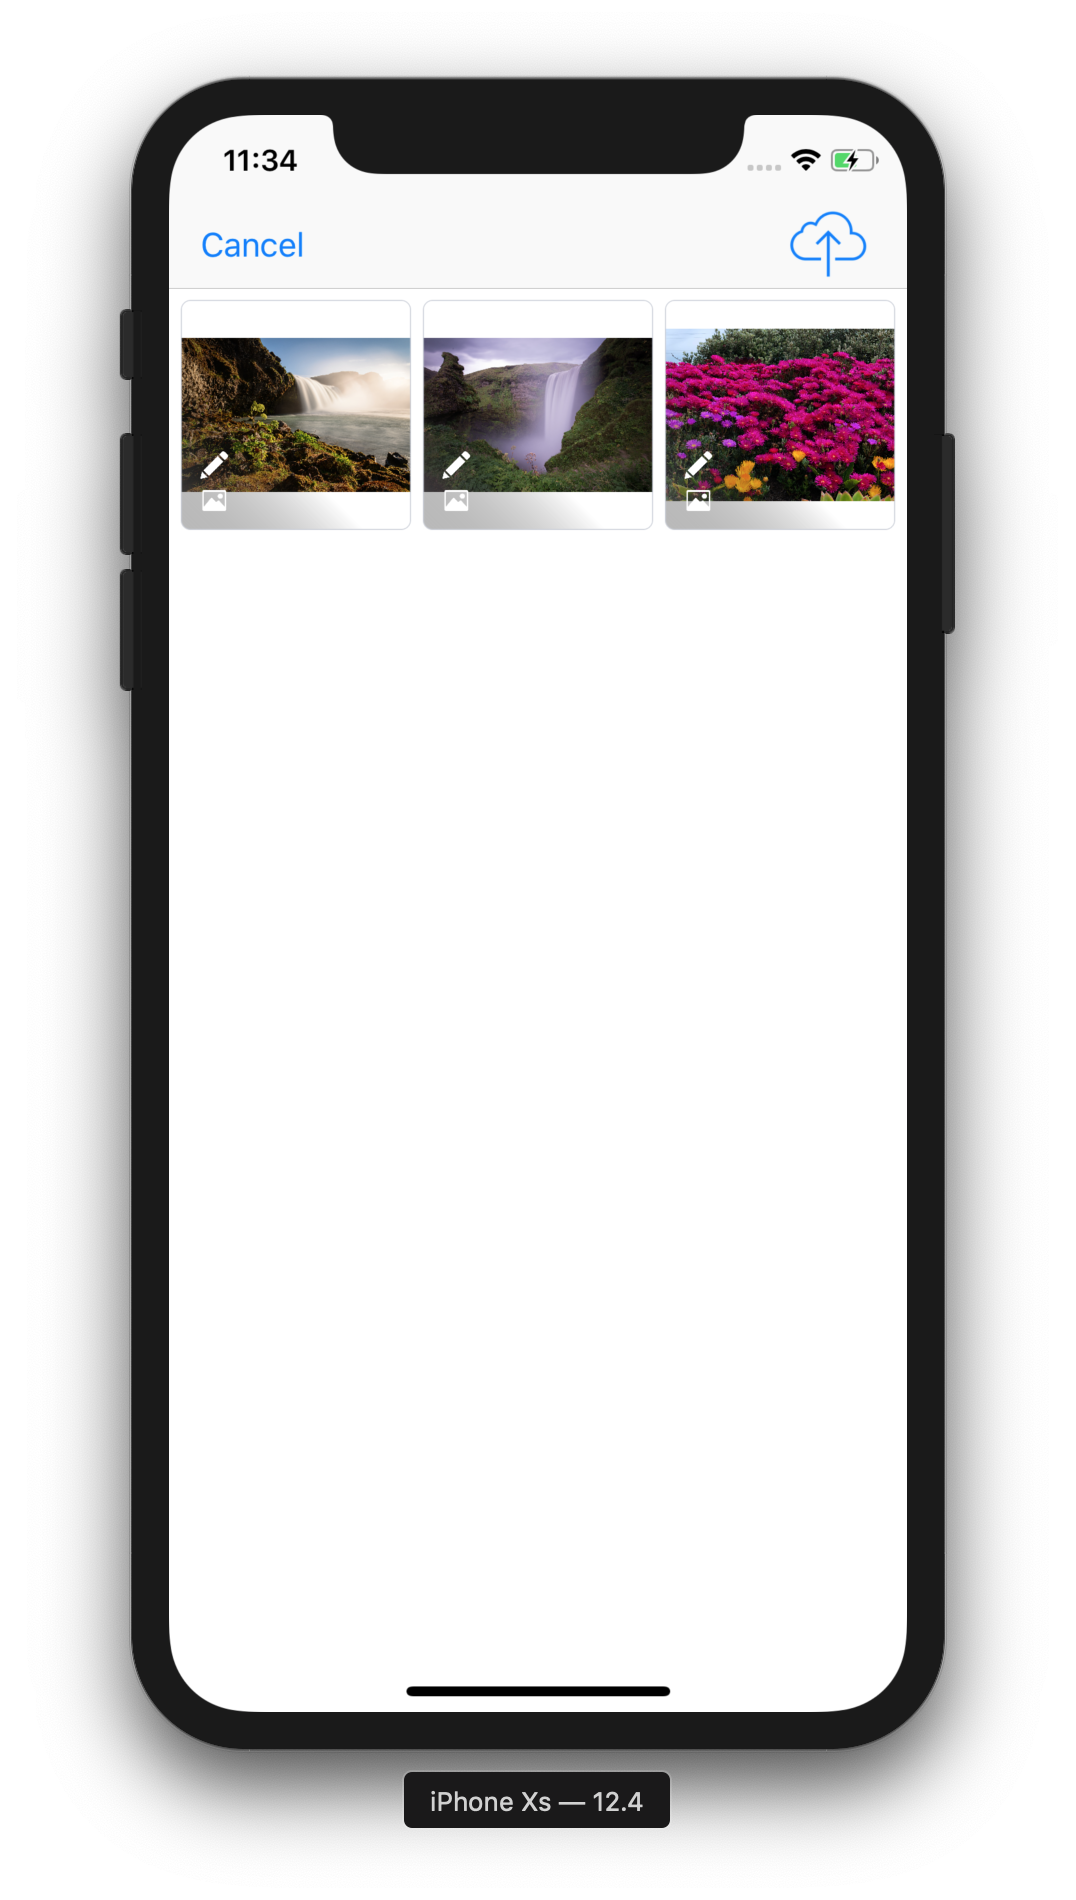
- Pick multiple files from the photo library and edit them before storing them into the store location.
- Compatible with Swift 4.2 up to 5.0 and Objective-C.
Quick example of UI integration
Presenting the picker
// Create `Config` object.
let config = Filestack.Config.builder
    .with(appUrlScheme: "YOUR-APP-URL-SCHEME")
    .with(availableCloudSources: [.dropbox, .googledrive, .googlephotos, .customSource])
    .with(availableLocalSources: [.camera, .photoLibrary, .documents])
    .build()

// Instantiate the Filestack `Client` by passing an API key obtained from https://dev.filestack.com/
// together with a `Security` and `Config` object.
// If your account does not have security enabled, then you can omit this parameter or set it to nil.
let client = Filestack.Client(apiKey: filestackAPIKey, config: config)

// Store options for your uploaded files.
// Here we are saying our storage location is S3 and access for uploaded files should be public.
let storeOptions = StorageOptions(location: .s3, access: .public)

// Instantiate picker by passing the `StorageOptions` object we just set up.
let picker = client.picker(storeOptions: storeOptions)

// Optional. Set the picker's delegate.
picker.pickerDelegate = self

// Finally, present the picker on the screen.
present(picker, animated: true)
Quick example of image editor integration
We present the picker in the same fashion as in the previous example, making sure that the showEditorBeforeUpload setting is set to true in our config object. Optionally, to enable multiple file selections, maximumSelectionAllowed must be greater than 1. This can be easily achieved by using the new Config builder like so:
// Create `Config` object.
let config = Filestack.Config.builder
    .with(appUrlScheme: "YOUR-APP-URL-SCHEME")
    .with(maximumSelectionLimit: 10) // newly added setting
    .withEditorEnabled() // newly added setting
    .with(availableCloudSources: [.dropbox, .googledrive, .googlephotos, .customSource])
    .with(availableLocalSources: [.camera, .photoLibrary, .documents])
    .build()
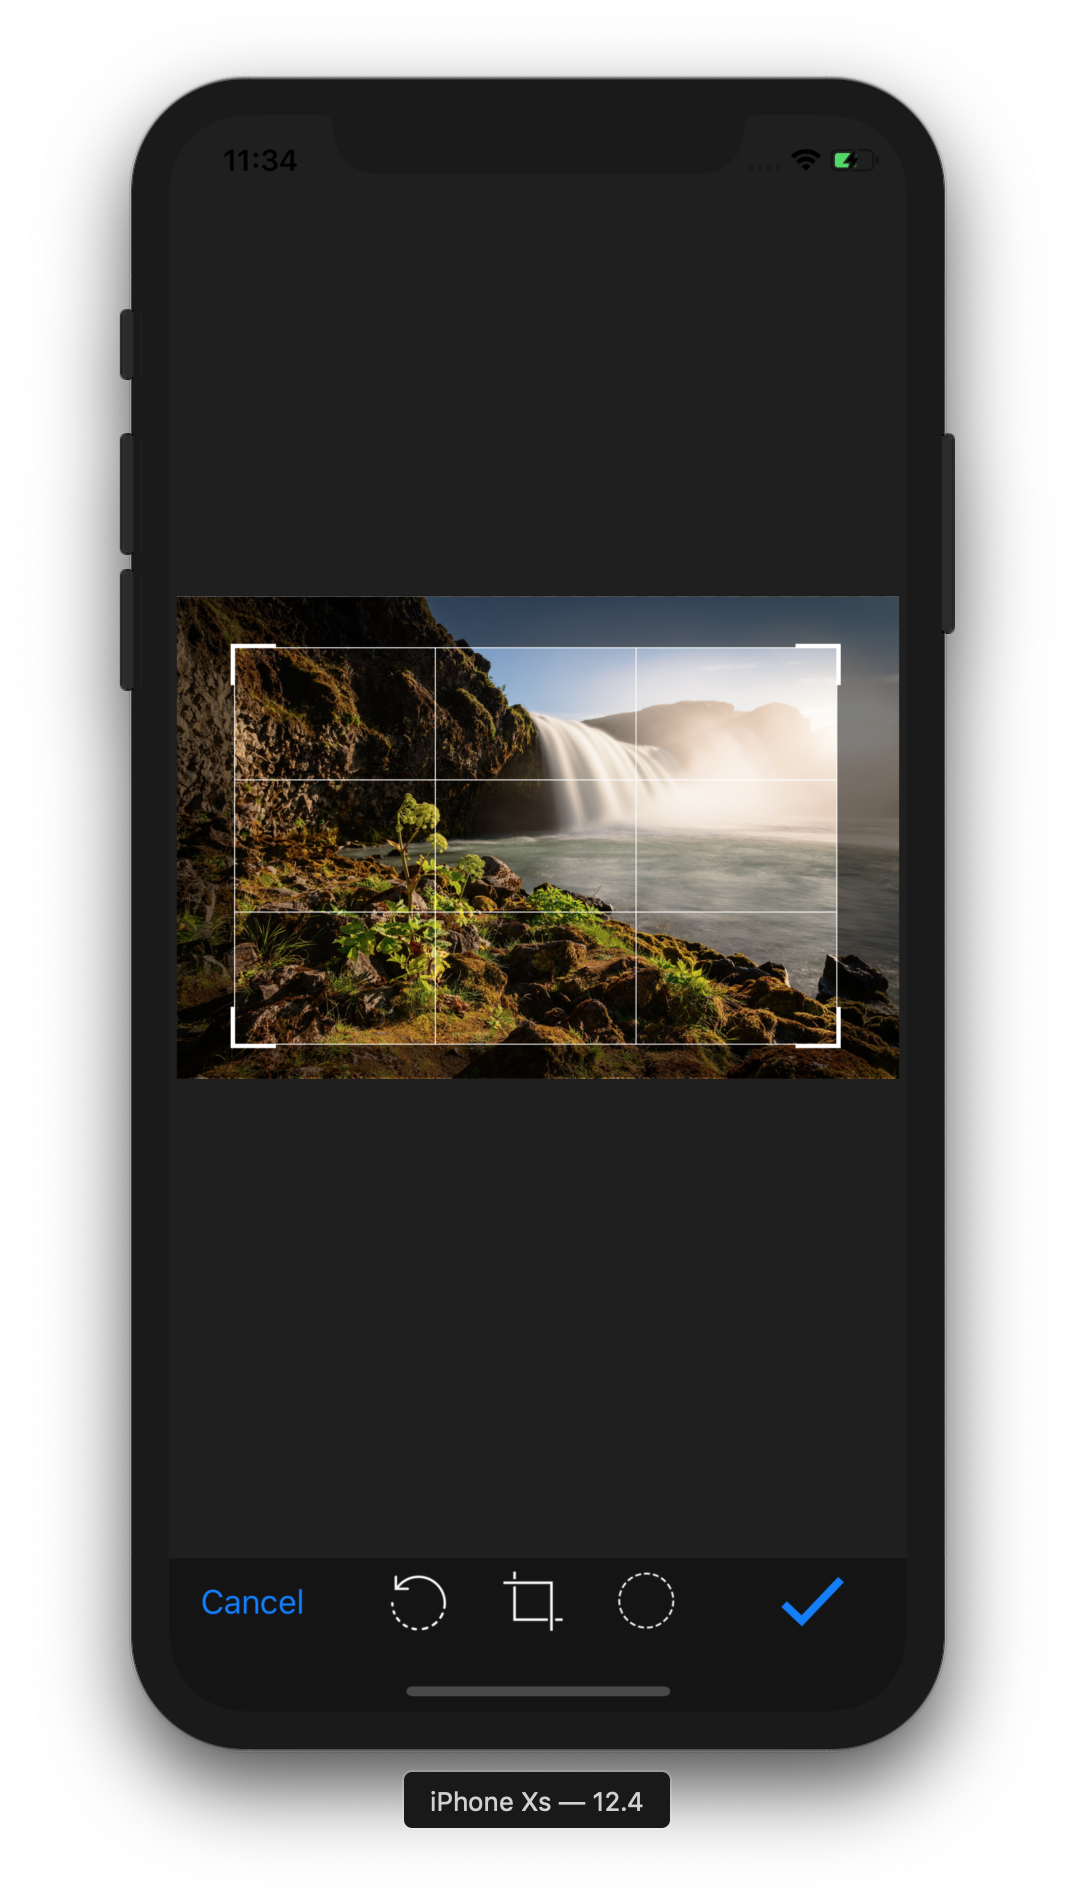
The editor currently supports 3 types of transformations:
- 90-degree rotation
- Rectangular crop
- Circular crop
| Editor File Selection | Editor |
|---|---|
 |
 |
Installation
Our Swift SDK can be installed using any of the methods listed below:
CocoaPods
CocoaPods is a dependency manager for Cocoa projects. You can install it with the following command:
gem install cocoapodsTo integrate FilestackSDK into your Xcode project using CocoaPods, specify it in your Podfile:
source 'https://github.com/CocoaPods/Specs.git'
platform :ios, '11.0'
use_frameworks!

target '<Your Target Name>' do
    pod 'Filestack', '~> 2.0'
end
Then, run the following command:
pod installCarthage
Carthage is a decentralized dependency manager that builds your dependencies and provides you with binary frameworks.
You can install Carthage with Homebrew using the following command:
brew update
brew install carthage
To integrate FilestackSDK into your Xcode project using Carthage, specify it in your Cartfile:
github "filestack/filestack-ios" ~> 2.0
Run carthage update to build the framework and then drag the built Filestack.framework into your Xcode project.
Additionally, add Filestack.framework, FilestackSDK.framework, Alamofire.framework, CryptoSwift.framework, SVProgressHUD.framework and ZipArchive.framework to the embedded frameworks build phase of your app’s target.
Manually
Alternatively, you may integrate Filestack into your project manually.
Embedded Framework
Open up Terminal, cd into your top-level project directory, and run the following command “if” your project is not initialized as a git repository:
git initAdd Filestack and its dependencies as git submodules by running the following commands:
git submodule add https://github.com/filestack/filestack-ios.git
git submodule add https://github.com/filestack/filestack-swift.git
git submodule add https://github.com/Alamofire/Alamofire.git
git submodule add https://github.com/krzyzanowskim/CryptoSwift.git
git submodule add https://github.com/SVProgressHUD/SVProgressHUD.git
git submodule add https://github.com/ZipArchive/ZipArchive.git
Open the new filestack-ios folder, and drag the Filestack.xcodeproj into the Project Navigator of your application’s Xcode project.
It should appear nested underneath your application’s blue project icon. Whether it is above or below all the other Xcode groups does not matter.
Select the Filestack.xcodeproj in the Project Navigator and verify the deployment target matches that of your application target.
Next, select your application project in the Project Navigator (blue project icon) to navigate to the target configuration window and select the application target under the “Targets” heading in the sidebar.
In the tab bar at the top of that window, open the “General” panel.
Click on the + button under the “Embedded Binaries” section and choose the Filestack.framework for iOS.
Repeat the same process for adding Alamofire, CryptoSwift, FilestackSDK, SVProgressHUD and ZipArchive frameworks.
Setup instructions
1. Setting up Policy and Security objects
// Create `Policy` object with an expiry time and call permissions.
let policy = Policy(expiry: .distantFuture,
                    call: [.pick, .read, .stat, .write, .writeURL, .store, .convert, .remove, .exif])

// Create `Security` object based on our previously created `Policy` object and app secret
// obtained from https://dev.filestack.com/
guard let security = try? Security(policy: policy, appSecret: "YOUR-APP-SECRET-HERE") else {
    fatalError("Unable to instantiate Security object.")
}
2. Setting up Config object
// Create `Config` object.
let config = Filestack.Config.builder
  .with(appURLScheme: "YOUR-APP-URL-SCHEME")
  .with(videoQuality: .typeHigh)
  .with(imageURLExportPreset: .current)
  .with(maximumSelectionLimit: 10)
  .withEditorEnabled()
  .with(availableCloudSources: [.dropbox, .googledrive, .googlephotos, .customSource])
  .with(availableLocalSources: [.camera])
  .build()
IMPORTANT: Authentication against cloud providers depends on the appURLScheme setting being correctly configured, so make sure yours is properly added to your app’s plist. For instance, in our demo app, this is “filestackdemo”:

3. Setting up Client object
// Instantiate the Filestack `Client` by passing an API key obtained from https://dev.filestack.com/,
// together with a `Security` and `Config` object.
// If your account does not have security enabled, then you can omit this parameter or set it to `nil`.
let client = Filestack.Client(apiKey: "YOUR-API-KEY-HERE", security: security, config: config)
4. Instantiating the picker with custom storage options
// Store options for your uploaded files.
// Here we are saying our storage location is S3 and access for uploaded files should be public.
let storeOptions = StorageOptions(location: .s3, access: .public)

// Instantiate picker by passing the `StorageOptions` object we just set up.
let picker = client.picker(storeOptions: storeOptions)
5. (Optional) Setting picking behavior
Upload and Store Behavior
/// After finishing picking, local files are uploaded and cloud files are stored at the store destination.
picker.behavior = .uploadAndStore(uploadOptions: .defaults)
Store Only Behavior
/// After finishing picking, only cloud files are stored at the store destination.
picker.behavior = .storeOnly
6. Setting the picker’s delegate
picker.pickerDelegate = selfAnd implement the PickerNavigationControllerDelegate protocol in your view controller, i.e.:
extension ViewController: PickerNavigationControllerDelegate {
    func pickerStoredFile(picker: PickerNavigationController, response: StoreResponse) {
        if let contents = response.contents {
            // Our cloud file was stored into the destination location.
            print("Stored file response: \(contents)")
        } else if let error = response.error {
            // The store operation failed.
            print("Error storing file: \(error)")
        }
    }

    func pickerUploadedFile(picker: PickerNavigationController, response: NetworkJSONResponse?) {
        if let contents = response?.json {
            // Our local file was stored into the destination location.
            print("Uploaded file response: \(contents)")
        } else if let error = response?.error {
            // The upload operation failed.
            print("Error uploading file: \(error)")
        }
    }
}
7. Presenting the picker on the screen
yourViewController.present(picker, animated: true)Finally, let your app handle the custom app URL scheme we defined earlier by adding something like this to your AppDelegate:
func application(_ app: UIApplication, open url: URL, options: [UIApplicationOpenURLOptionsKey : Any] = [:]) -> Bool {
    // Make sure to change "YOUR-APP-URL-SCHEME" to the `appURLScheme` you set up earlier in your config object.
    // e.g. url.scheme == "filestackdemo".
    if url.scheme == "YOUR-APP-URL-SCHEME" && url.host == "Filestack" {
        return true
    }

    // Here we just state that any other URLs should not be handled by this app.
    return false
}
8. Enabling background upload support
Starting in FilestackSDK 2.3, background upload support is available. In order to use it in Filestack for file uploads, simply add the following to your code:
// Set `UploadService.shared.useBackgroundSession` to true to allow uploads in the background.
FilestackSDK.UploadService.shared.useBackgroundSession = true
9. Implementing custom picker sources
Starting in Filestack iOS SDK 2.8.0, SDK users can add their own custom source implementations by following these steps:
Create a new view controller that inherits from
UIViewControllerand implementsSourceProvider:class MyCustomSourceProvider: UIViewController, SourceProvider { // 1. Add `sourceProviderDelegate` weak var sourceProviderDelegate: SourceProviderDelegate? // 2. Add initializer. init() { // TODO: Implement initializer. } // 3. Call this function whenever you want to start uploading files. // These should be passed to the source provider delegate as an array of locally stored URLs. @objc func upload() { let urls = Array(urls) dismiss(animated: true) { self.sourceProviderDelegate?.sourceProviderPicked(urls: urls) } } // 4. Call this function whenever you want to dismiss your source provider without uploading. @objc func cancel() { dismiss(animated: true) { self.sourceProviderDelegate?.sourceProviderCancelled() } } // TODO: Continue implementing your view controller. }Set up your custom source:
/// Returns a custom `LocalSource` configured to use an user-provided `SourceProvider`.
func customLocalSource() -> LocalSource {
    // Instantiate your source provider
    let customProvider = MyCustomSourceProvider()

    // Optional. Configure your `customProvider` object
    customProvider.urls = [url1, url2, url3]

    // Define your custom source
    let customSource = LocalSource.custom(
        description: "Custom Source",
        image: UIImage(named: "icon-custom-source")!,
        provider: customProvider
    )

    // Return your custom source
    return customSource
}
Pass your custom source to your
Configobject:Using
Filestack.Config.builder:.with(availableLocalSources: [.camera, .photoLibrary, .documents, customLocalSource()])Using
Filestack.Configdirectly:config.availableLocalSources = [.camera, .photoLibrary, .documents, customLocalSource()]