Setup OAuth for Google Drive
Learn how to set up OAuth for Google Drive and create your own OAuth application for a seamless file uploading experience using Filestack.
Create your own Google Drive OAuth application
By default, you do not need to configure anything to start uploading files from Google Drive, Filestack is ready to go out of the box. When a user logs into their Google Drive account from your site, the Filestack company application will show up. You can configure it so that your application shows up instead in order to make a more seamless experience for your customers.
This is also a MUST if you are using Custom CNAME with your Filestack application. If this step is not completed prior to using CNAME in a production environment, your users will not be able to access Google Drive. Please note that this process requires scope approval from Google, which can take 3-5 business days. Let’s get started!
Go to Google API Console and choose Create New Project.

After creating new project it will redirect you to the “Credentials” page but before creating new credentials click on the “Enabled Api and services”. Search for Google Drive Api and enable it

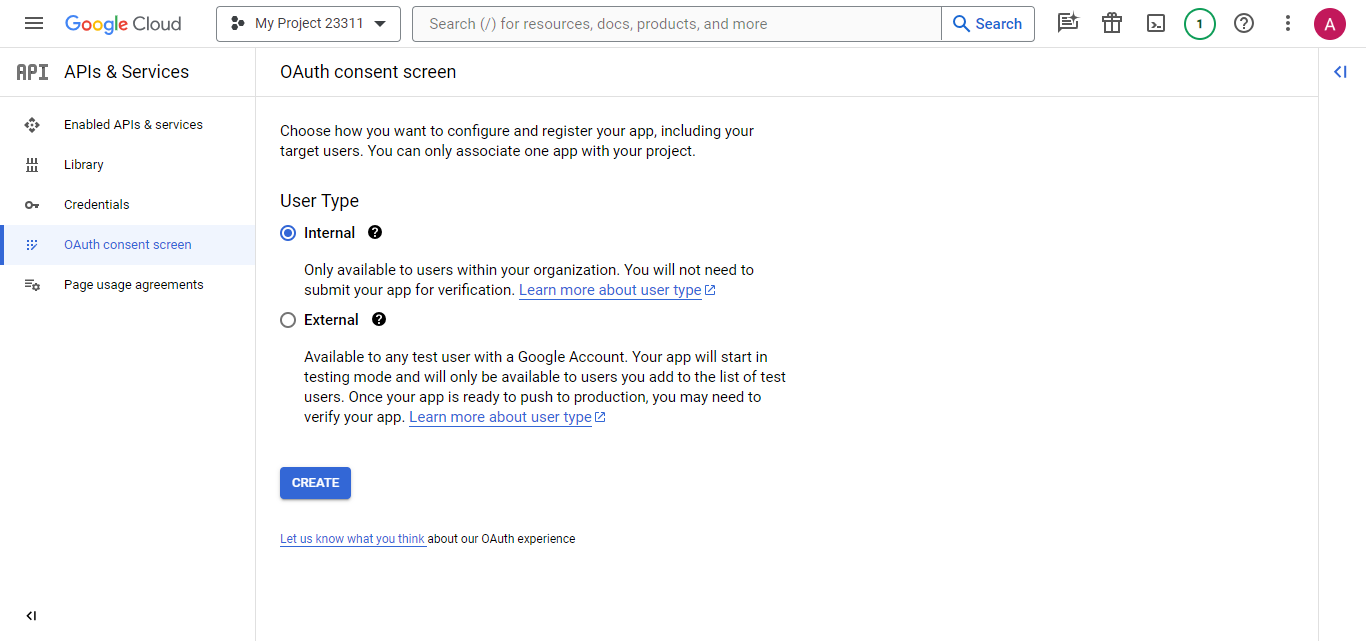
Now click on “OAuth consent screen”.

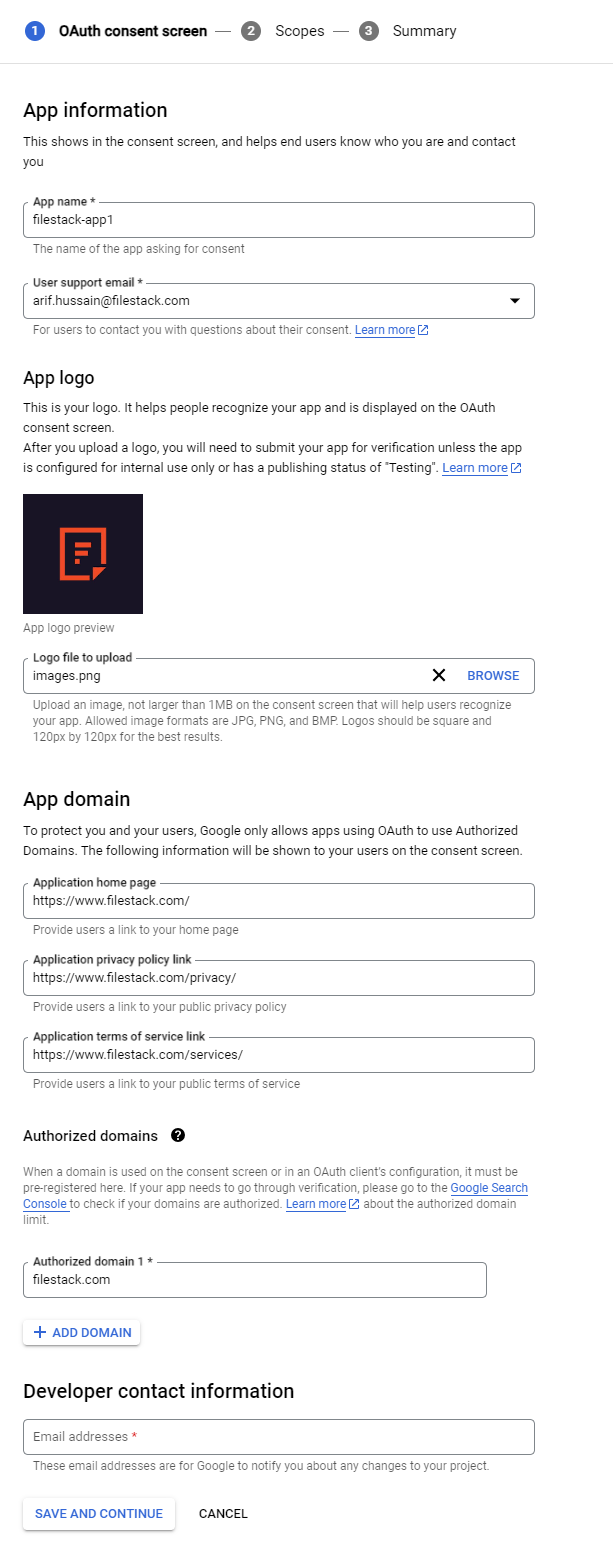
By clicking the create button it will bring you to this form where you can configure your OAuth consent screen settings. This is the content your users will see when they connect to your Google Drive Application.

- Add a privacy policy – we use this one: https://www.filestack.com/privacy/
Note: If you are using a Custom CNAME in your Filestack application you must add your CNAME subdomain here as well.
After configuring the OAuth consent screen , click on “Credentials”.
On the credentials screen select Google Drive API, Web Browser (Javascript), and User Data. Then go to the next step.

Give your client a name.
- Enter
https://www.filestackapi.comfor Authorized Javascript Origins - Enter
https://www.filestackapi.com/api/client/googledrive/authCallback/openandhttps://www.filestackapi.com/api/client/googledrive/authCallback/saveasfor Authorized Redirect URIs.
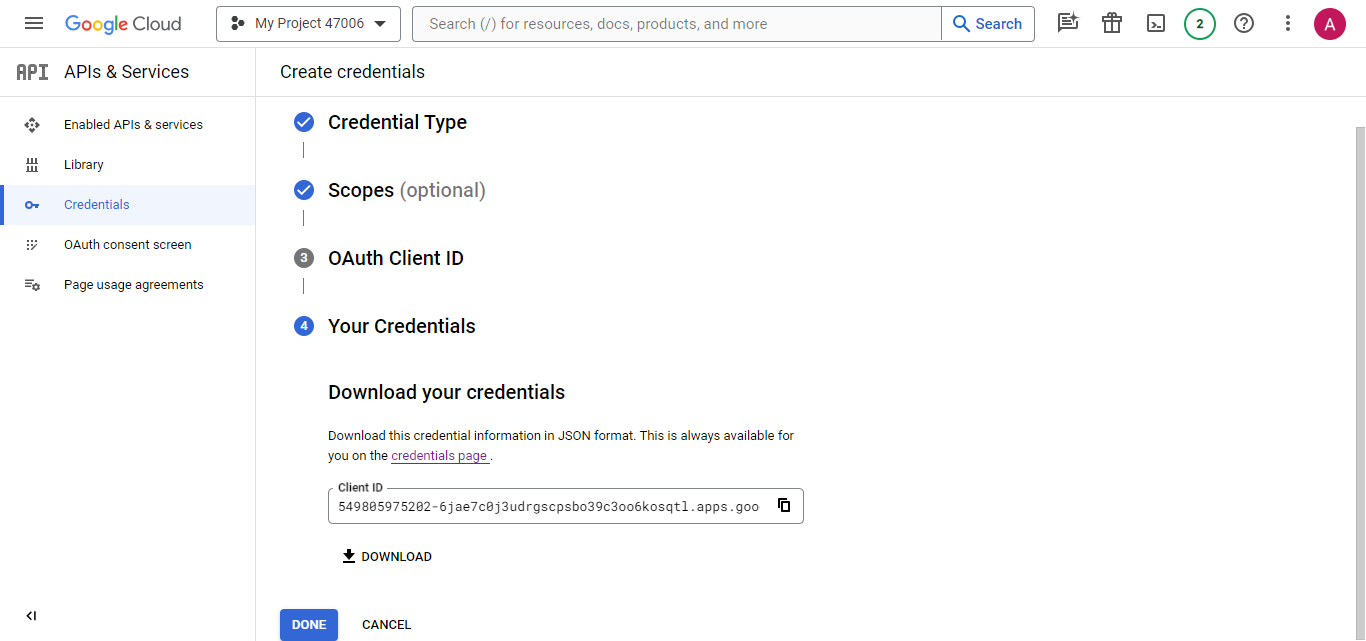
Download your credentials

- This will be a JSON file that contains your App Key and App Secret.
Make sure to save the name of your Google Project ID.
Before you add your credentials to your Filestack Developer Portal you will need to submit the Google App Verification form
Make sure that the domain you will be using the picker on is verified with Google
The Product name is the name of your application
The Project ID will be the one you saved during step 6.
The Client ID will be in the JSON file that you saved in step 6.
The Privacy Policy will be the same link that you entered in “OAuth consent screen” form.
You will need to ask for the https://www.googleapis.com/auth/drive.readonly scope in order to use Google Drive. The justification is that this scope is required to allow users to access their own Google Files.
Where the form asks if there is any additional information you can state that this is related to the authorization for filestackapi.com
Once you’ve submitted your form, it may take Google 3-5 days to respond. If you have any trouble with getting the application approved please reach out to us at support@filestack.com
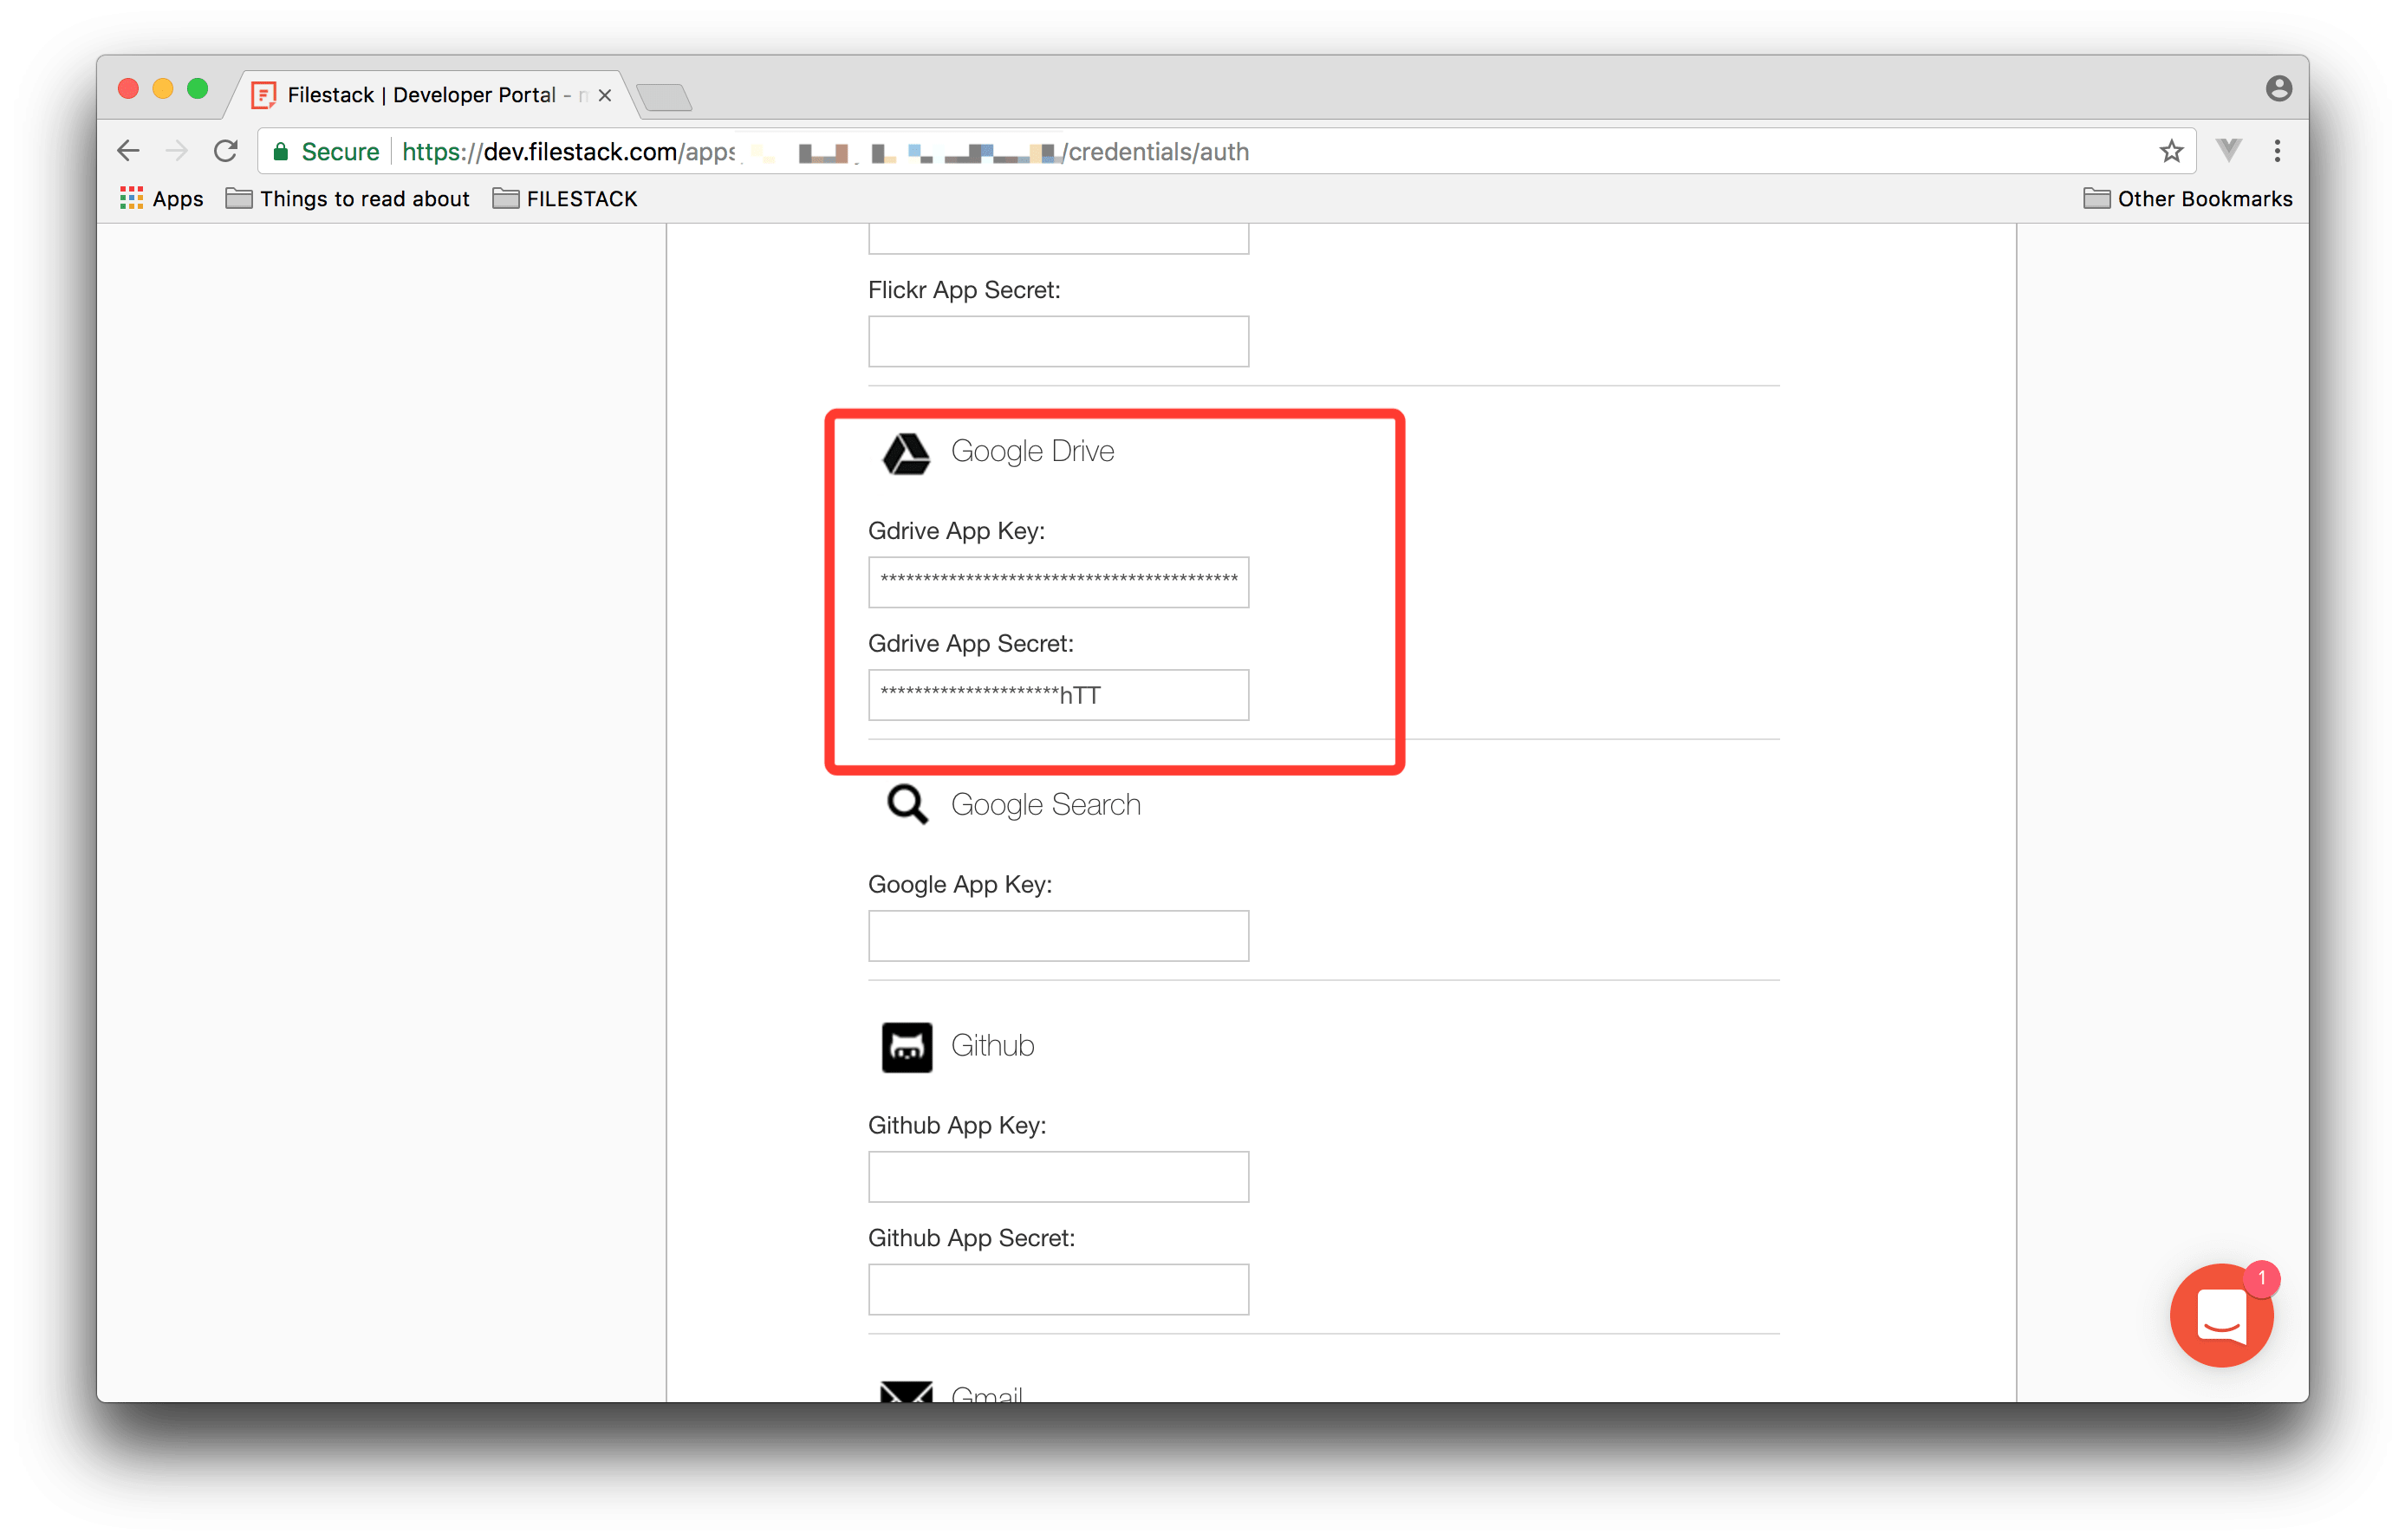
Once you’ve recieved approval from Google you will need to enter your Client ID and Key into your Developer Portal.
In your Filestack developer portal click on Auth Keys under Credentials and scroll down to find the Google Drive App Key and App Secret. Enter your Client ID in the Gdrive App Key field and your Client Secret in the Gdrive App Secret field. Then click Save Auth Credentials at the bottom of the page.
